Manage a member across all workspaces
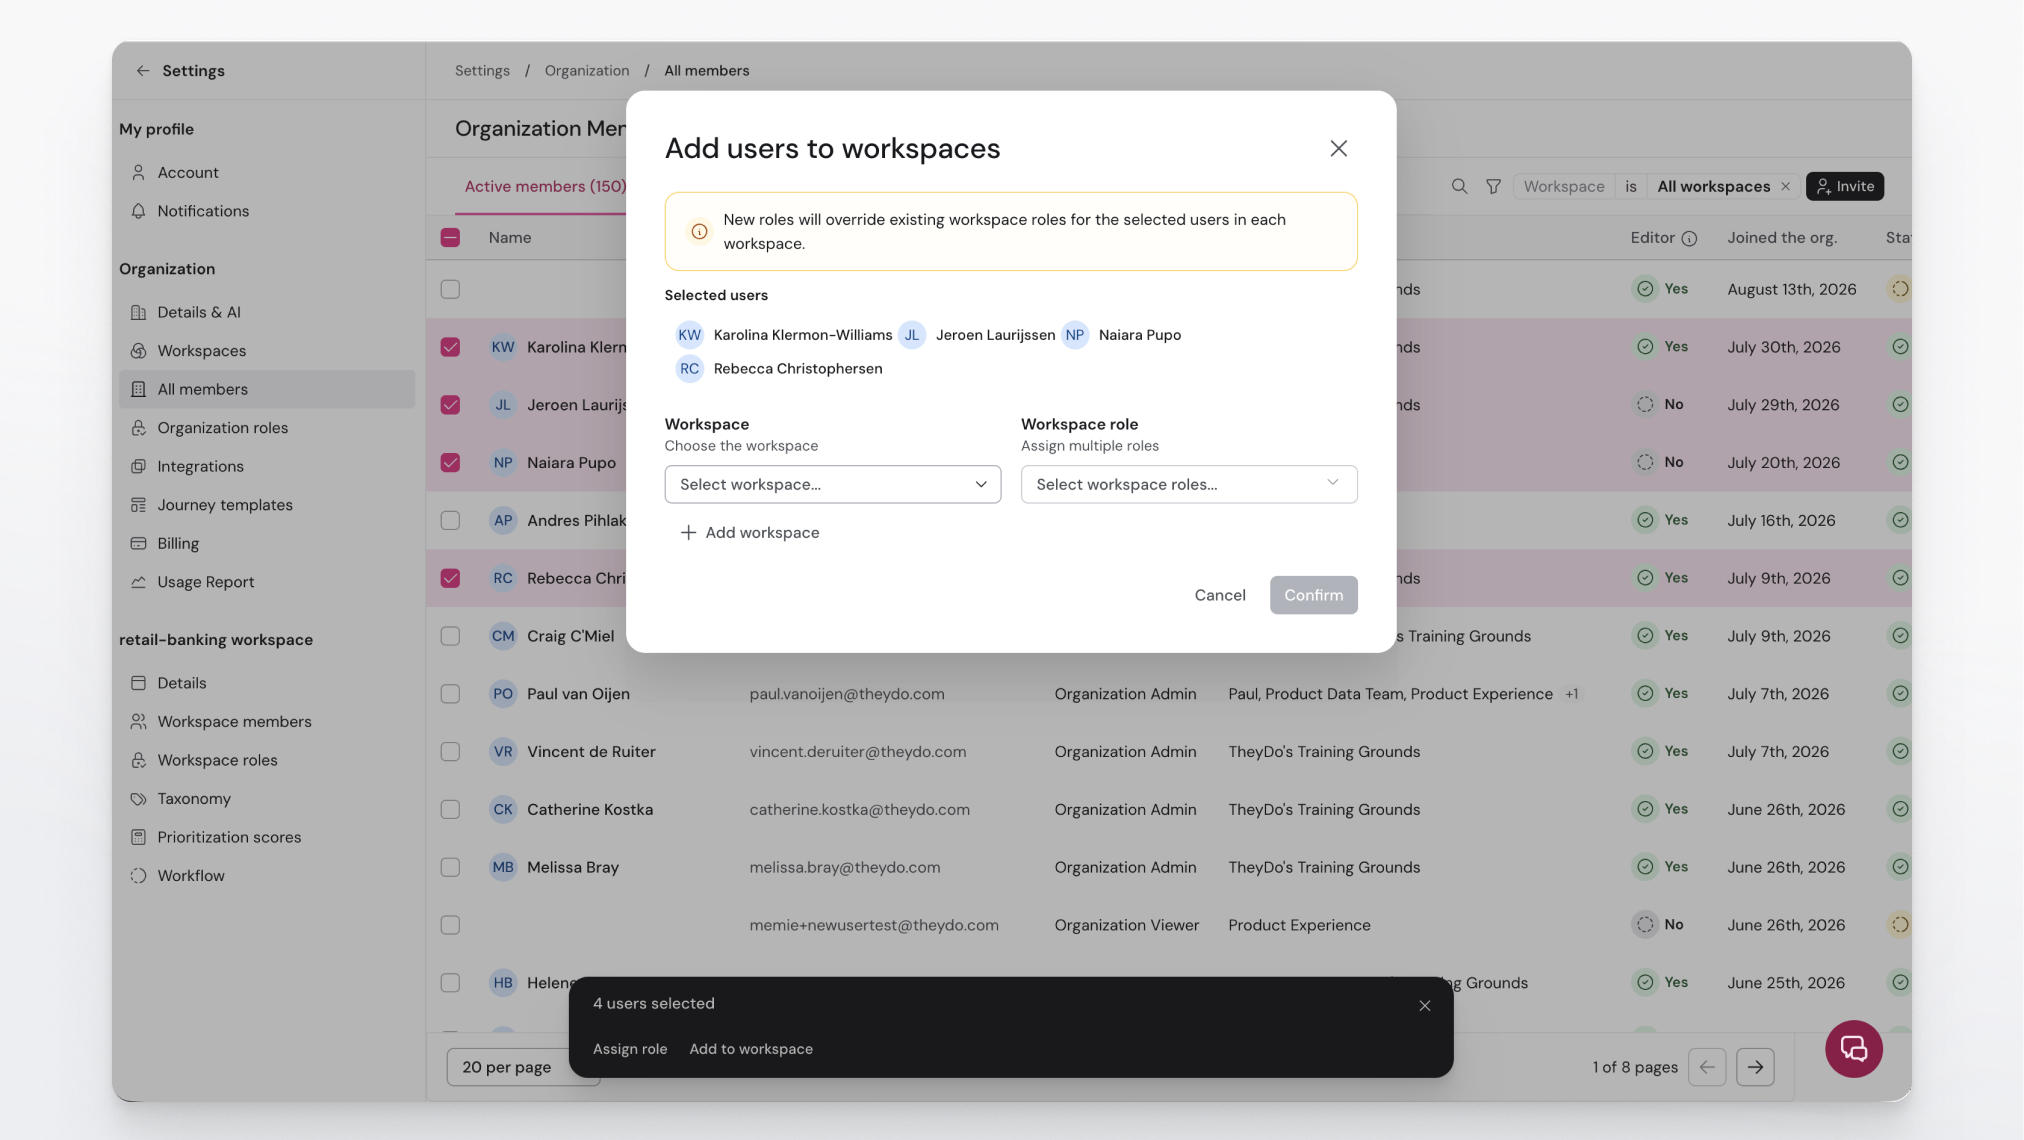
This article is for admins who manage who has access to what. It shows how to manage one person's access across every workspace they belong to from a single page, instead of repeating the same invite or removal steps in each workspace separately.
Why manage access in one place
Membership used to be managed one workspace at a time. If a new hire needed five workspaces, that meant five separate invites. The All members page brings all of that together: you edit a person's access across every workspace they touch from one view, and you can see the actual workspace names they belong to rather than just a count.
Open the All members page
- Open
Settings. - Under the organization settings, select
All members. - Find the person you want to manage. You can search by name or email.
Note: The
All memberspage is part of organization settings and is visible only to users with the relevant management permission.
Add someone to the workspaces they need
- On the
All memberspage, select the person's row. - From the toolbar click
Add to workspace - Set the role they should hold in each workspace.
- Save your changes.
This lets you onboard someone into every workspace they need in one action, rather than inviting them to each workspace on its own.
Change or remove access
From the same row you can adjust a person's workspaces at any time.
- Open the person's row on the
All memberspage. - Add or remove workspaces, or change their role in a workspace.
- To offboard someone completely, remove their access everywhere at once.
Tip: Managing access from one page also makes audits easier. You can see, per person, exactly which workspaces they can reach and with which role.
Roles and access
The access someone has in a workspace is defined by their role. Organization roles are assigned on the All members page or during invite. For more detail, see what are roles and permissions.