How journey permissions work
If you run a large workspace, you want people to contribute to journeys without worrying that someone will accidentally restructure the whole thing. Journey permissions let you give each person exactly the access they need, split across three tiers: Content, Structure, and Governance. This article explains what each tier allows and how to assign it through your workspace roles.
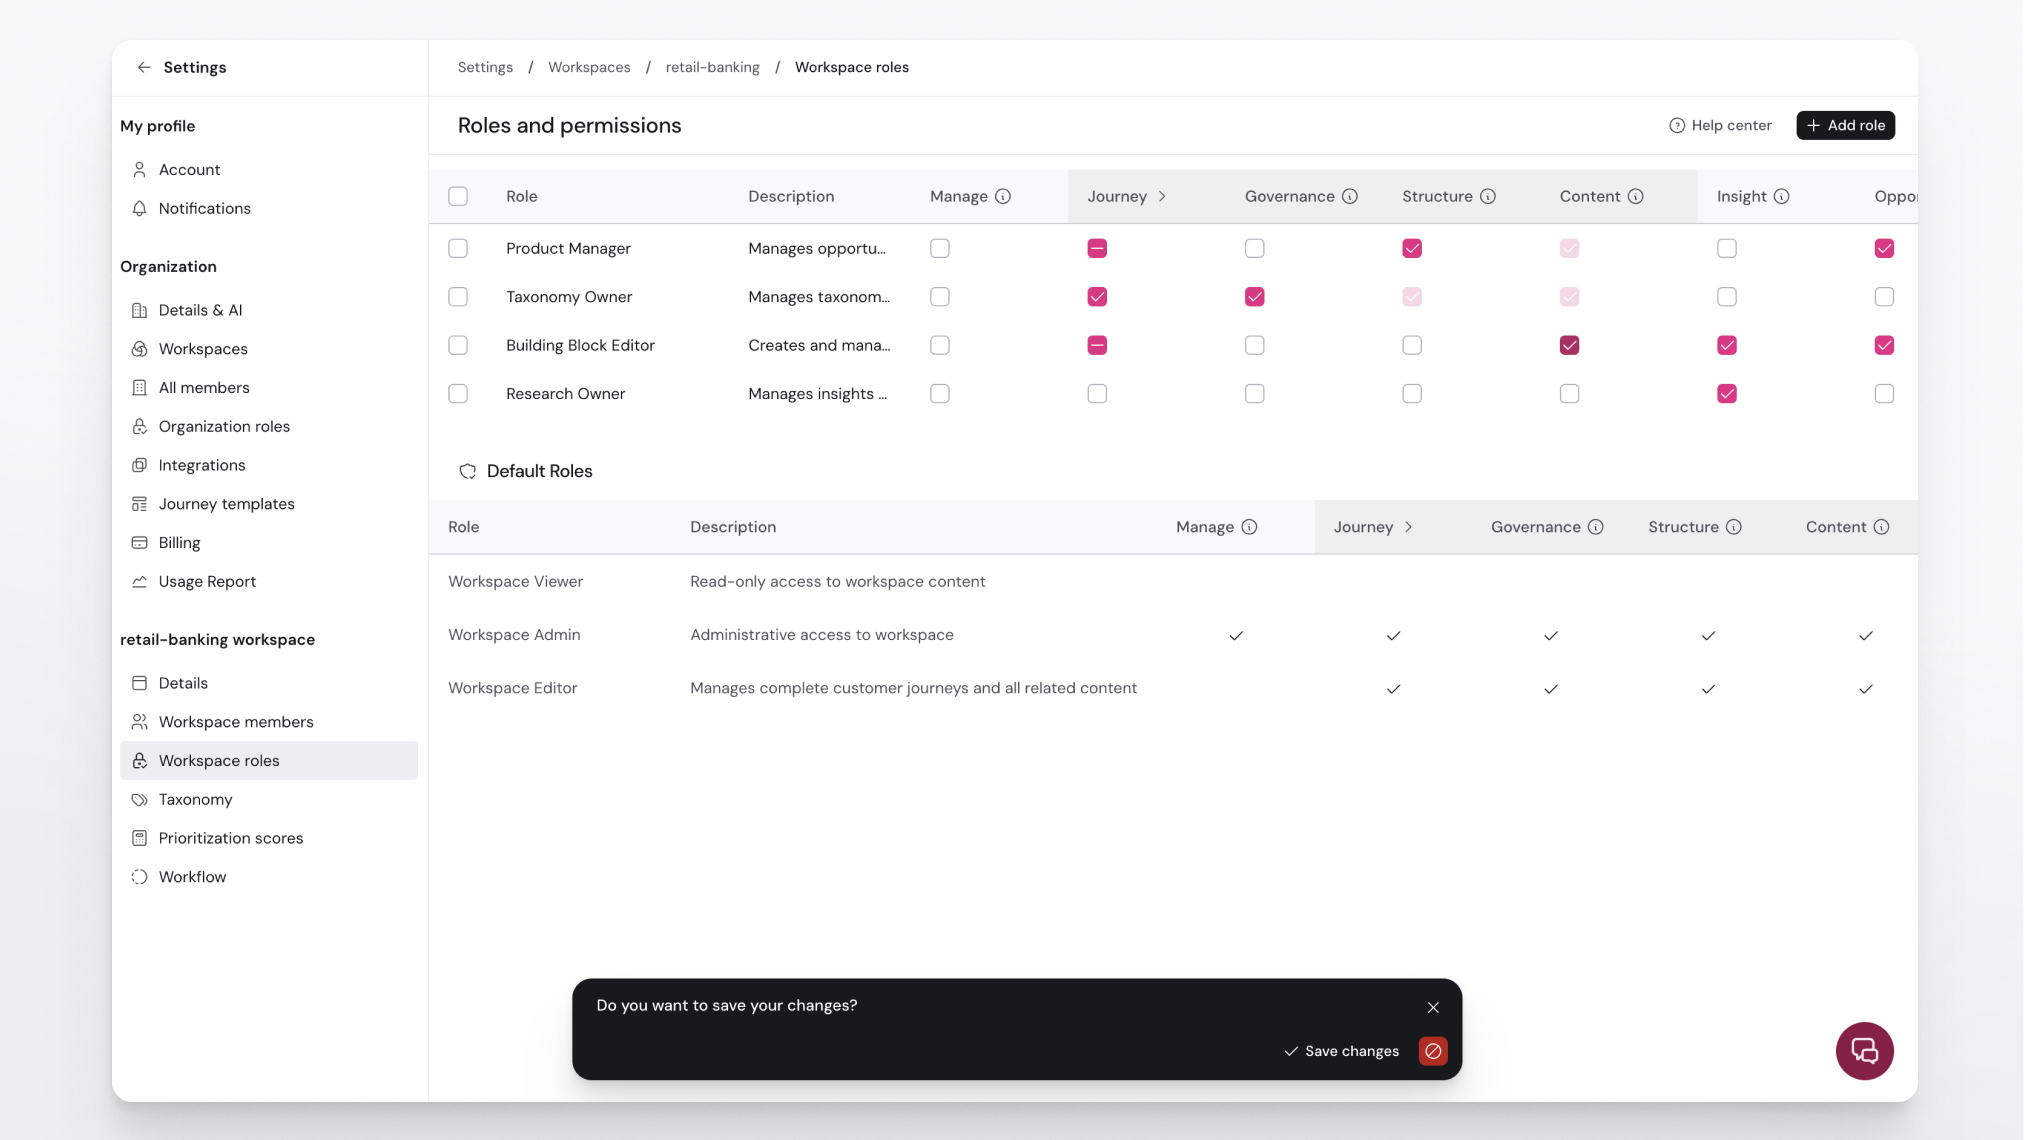
Why journey permissions have three tiers
Edit access to a journey used to be all or nothing: either someone could change everything, or they could only view. That made it hard to let a wide group help out while keeping the shape of a journey stable.
The three tiers fix that by separating what lives in a journey from how it is built:
Contentlets people work inside the journey without changing its shape.Structurelets people change the shape of the journey itself.Governanceadds control over the journey's lifecycle, including who can create and lock journeys.
The tiers cascade, so each higher tier includes everything below it. Someone with Structure can also do everything Content allows, and someone with Governance can do everything in all three tiers.
What each tier allows
Content. Edit the content that lives inside a journey's lanes: the cards, text, tags, links, and other entries on each step. People with only Content access can keep the data on a journey current, but they cannot add, remove, or rearrange the phases, steps, and lanes that make up its structure. This is the right level for building-block editors and contributors who manage the data, not the layout.
Structure. Everything in Content, plus the ability to shape the journey itself: add, reorder, and remove phases, steps, and lanes, and edit the journey's details. This is the level for the people who actually build and maintain journeys.
Governance. Everything in Structure, plus lifecycle control over journeys: creating new journeys, deleting them, and locking or unlocking a journey's structure. Because Governance is what gates journey creation, it is also your main lever for keeping journey sprawl (and cost) under control.
How to assign a permission tier
You assign tiers through workspace roles, then give people those roles.
- Go to
Settings > Workspace > Roles. - Select the role you want to change, or create a new custom role.
- Under the journey permissions for that role, tick
Content,Structure, orGovernance. Ticking a higher tier automatically includes the ones below it. - Save the role.
- Assign the role to the right people from
Settings > Workspace > Members.
Note: The three built-in system roles (
Workspace Admin,Workspace Editor, andWorkspace Viewer) cannot be edited. To grant a specific tier, use one of the seeded custom roles or create your own. For example, the seededBuilding Block Editorrole is a good starting point for content-only access. Tip: A person can hold more than one workspace role at a time. Their effective access is the highest tier any of their roles grants.
Lock the top, keep editing free lower down
Journeys often sit in a nested hierarchy: a high-level parent journey with more detailed journeys beneath it, sometimes owned by different teams or regions. You can freeze the top while leaving the lower levels open to edit.
Anyone with Governance can lock a journey from the three-dot actions menu on the journey (Lock journey). A locked journey becomes read-only for everyone, no matter what tier they hold: the structure controls disappear and the journey cannot be deleted while it is locked. Unlock it the same way (Unlock journey) when you need to make changes again.
So an admin can lock the structure of a top-level journey to protect the shared framework, while teams working in the journeys below it keep their Structure or Content access and carry on editing.
Keep journey sprawl and cost in check
Because only Governance can create journeys, you can concentrate that ability with a small group of leads and keep the total number of journeys deliberate. Edit access also maps to editor seats, which are billable, so granting the lowest tier that does the job keeps both sprawl and cost down.
Tip: If most of your team only needs to keep data current, give them
Contentaccess. ReserveStructurefor the people who build journeys andGovernancefor the few who own the workspace's journey landscape.